Understanding the roofing installation process can feel overwhelming, especially if it’s your first time navigating this essential home improvement project. From the initial consultation to the final walkthrough, knowing what to expect can make the experience smoother and more manageable. Have you ever wondered what happens when the old roofing materials come off or how weather might impact your installation schedule? These are just a few of the questions we’ll explore to give you peace of mind and confidence in your roofing project.
We’ve got you covered with a step-by-step guide that walks you through each stage, from pre-installation preparation to post-installation maintenance. You’ll learn about the importance of detailed inspections, how to prepare your home, and what safety measures the professional crew will take. We will also discuss the quality control measures in place to ensure your new roof is installed correctly and efficiently. By the end, you’ll have a clear understanding of the entire process, helping you feel more connected and informed about the work being done on your home.
Pre-Installation Preparation
Initial Consultation and FREE DETAILED ROOF INSPECTIONS
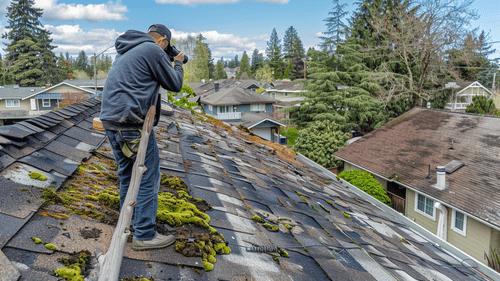
The journey towards a new roof begins with an initial consultation, a crucial step to ensure that both the homeowner and the roofing professional are on the same page. During this stage, a thorough and FREE DETAILED ROOF INSPECTION is conducted. This inspection allows the roofing professional to assess the current condition of the roof, identify any underlying issues, and determine the scope of work required. The inspection typically includes checking for signs of wear and tear, water damage, and structural integrity. By conducting a detailed inspection, homeowners can gain a clear understanding of the necessary repairs or replacements, ensuring there are no surprises down the line.
Detailed Estimate and Timeline Expectations
Following the inspection, the roofing professional will provide a detailed estimate and timeline expectations. This estimate will outline the costs associated with the project, including materials, labor, and any additional expenses. It’s essential for homeowners to review this estimate carefully and ask any questions they may have. Understanding the financial aspects of the project helps in budgeting and planning. Additionally, the timeline provided will give homeowners an idea of how long the project will take, allowing them to make necessary arrangements. On average, a professional crew can install shingles on an average-sized roof in 1 to 3 days, with asphalt shingle roofing generally requiring only 1-2 days for installation.
Preparing Your Home: What Homeowners Need to Do
Before the installation begins, homeowners need to prepare their homes to ensure a smooth and efficient process. This preparation includes:
- Clearing the driveway and surrounding areas to provide easy access for the roofing crew and their equipment.
- Removing any valuable or fragile items from the attic, as vibrations from the installation process can cause them to shift or fall.
- Informing neighbors about the upcoming project, as there may be some noise and disruption during the installation.
Taking these steps helps in minimizing any potential inconveniences and ensures that the roofing crew can work without any hindrances.
Understanding the Role of Weather and Scheduling
Weather plays a significant role in roofing installation, and it’s essential to understand how it can impact the schedule. Roofing professionals closely monitor weather forecasts to ensure that the installation takes place under optimal conditions. Rain, snow, or extreme temperatures can delay the project, as working in such conditions can compromise the quality of the installation and pose safety risks. Homeowners should be prepared for potential rescheduling and communicate with the roofing professional to stay informed about any changes. By understanding the role of weather and being flexible with scheduling, homeowners can ensure that their new roof is installed under the best possible conditions.
Day of Installation: What to Expect
Arrival of the Professional Crew
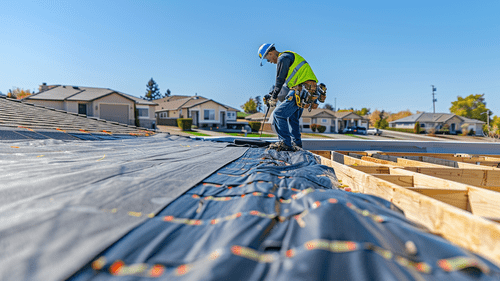
On the day of installation, homeowners can expect the professional crew to arrive early, ready to start the project. The crew will typically consist of several skilled workers, each assigned specific tasks to ensure a streamlined process. Their punctuality and preparedness reflect the professionalism and efficiency that homeowners can expect throughout the project. The crew will bring all the necessary tools and materials, ensuring they are well-equipped to handle any challenges that may arise during the installation.
Safety Measures and Site Setup
Safety is a top priority during roofing installation, and the professional crew will take several measures to ensure a safe working environment. This includes setting up safety barriers and warning signs around the work area to keep both the crew and homeowners safe. The crew will also wear appropriate safety gear, such as helmets, harnesses, and non-slip footwear, to prevent accidents. Additionally, they will take steps to protect the property, such as covering plants and outdoor furniture to prevent damage from falling debris. By prioritizing safety, the roofing crew demonstrates their commitment to providing a secure and efficient service.
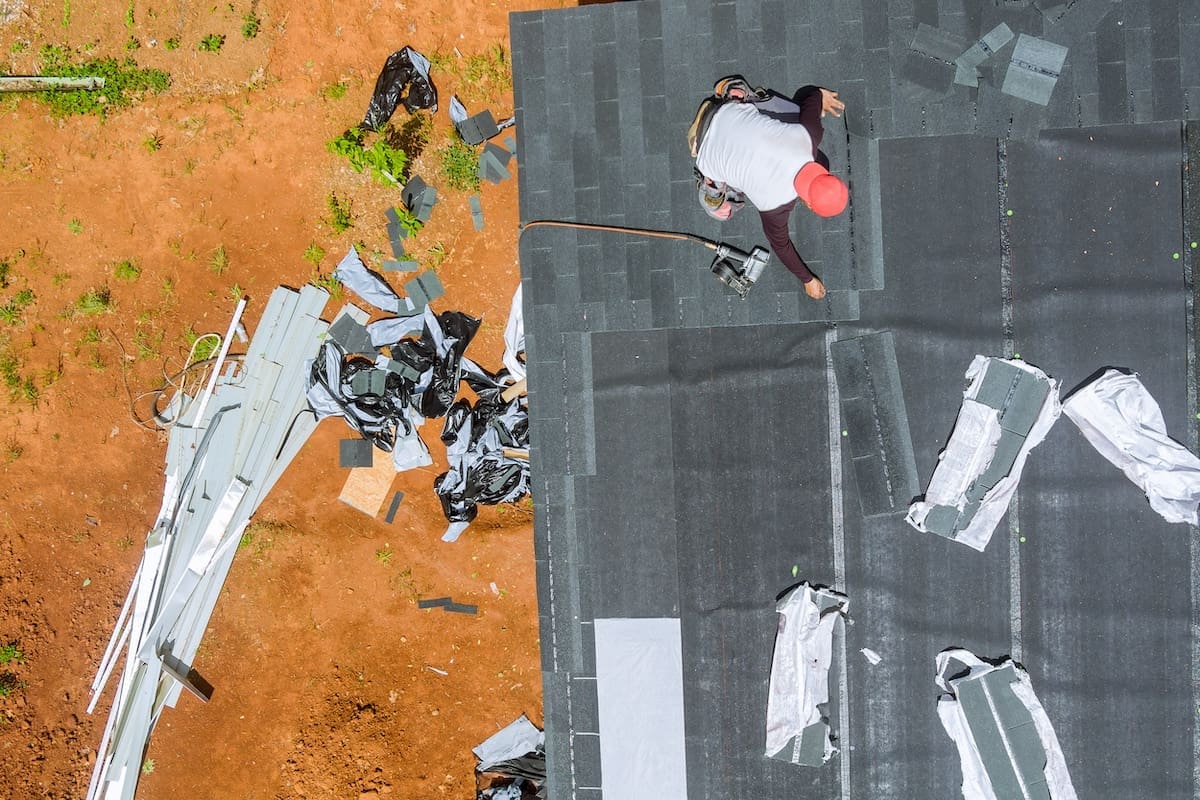
Removal of Old Roofing Materials
The first major task on the day of installation is the removal of old roofing materials. This process involves stripping away the existing shingles, underlayment, and any damaged components. The crew will carefully remove these materials, ensuring they do not cause any damage to the underlying structure. Proper disposal of the old materials is also crucial, and the crew will typically use a dumpster or truck to transport the debris to a designated disposal site. This step is essential to prepare the roof for the installation of new materials and to ensure a clean and organized work area.
Inspection and Repair of Roof Decking
Once the old roofing materials have been removed, the crew will conduct a thorough inspection of the roof decking. This step is crucial to identify any areas that may require repair or reinforcement before the new roofing materials are installed. The roof decking serves as the foundation for the entire roofing system, and any weaknesses or damage must be addressed to ensure the longevity and stability of the new roof. The crew will repair or replace any damaged sections of the decking, ensuring a solid and secure base for the new shingles. This attention to detail is vital for the overall success of the roofing installation.
Installation of New Roofing Materials
Step-by-Step Installation of Asphalt Shingles
The installation of new roofing materials begins with the application of an underlayment, which acts as a protective barrier against moisture. This is followed by the installation of asphalt shingles, starting from the bottom edge of the roof and working upwards. Each shingle is carefully aligned and secured to ensure a uniform and aesthetically pleasing appearance. The crew will use specialized tools and techniques to ensure that the shingles are properly fastened and sealed, preventing any potential leaks. This step-by-step process ensures that the new roof is installed correctly and efficiently, providing homeowners with peace of mind and confidence in the quality of the work.
Quality Control Measures and Ensuring Proper Installation
Quality control is a critical aspect of the roofing installation process. Throughout the installation, the crew will conduct regular inspections to ensure that each step is completed to the highest standards. This includes checking the alignment and spacing of the shingles, verifying that all fasteners are secure, and ensuring that the underlayment is properly installed. Any issues or discrepancies will be addressed immediately to prevent any long-term problems. By implementing stringent quality control measures, the roofing crew ensures that the new roof is installed correctly and will provide reliable protection for years to come.
Addressing Unexpected Issues and On-the-Spot Decisions
Despite careful planning and preparation, unexpected issues can arise during the installation process. This may include discovering hidden damage to the roof decking or encountering unforeseen challenges with the existing structure. The professional crew is trained to handle these situations and make on-the-spot decisions to address any issues promptly. This may involve additional repairs or adjustments to the installation plan. Homeowners can trust that the crew will communicate any changes and provide expert recommendations to ensure the best possible outcome. By being adaptable and responsive, the roofing crew demonstrates their commitment to delivering a high-quality and reliable service.
Clean-Up Process and Final Inspection
Once the installation is complete, the crew will conduct a thorough clean-up of the work area. This includes removing any remaining debris, tools, and materials, ensuring that the property is left in pristine condition. The crew will also conduct a final inspection of the new roof to verify that all aspects of the installation meet the required standards. This inspection includes checking for proper alignment, secure fasteners, and overall appearance. Any final adjustments or touch-ups will be made to ensure that the new roof is flawless. By completing a meticulous clean-up and final inspection, the roofing crew ensures that homeowners are completely satisfied with the finished product.
Post-Installation: Ensuring Longevity and Quality
Final Walkthrough with the Roofing Professional
After the installation and clean-up are complete, the roofing professional will conduct a final walkthrough with the homeowner. This walkthrough provides an opportunity for the homeowner to inspect the new roof and ask any questions they may have. The roofing professional will explain the key features of the new roof, highlight any specific areas of interest, and provide maintenance tips to ensure its longevity. This final walkthrough is an essential step in ensuring that the homeowner is fully informed and satisfied with the completed project.
Warranty Information and What It Covers
Understanding the warranty information is crucial for homeowners to protect their investment. The roofing professional will provide detailed information about the warranty, including what it covers and the duration of the coverage. This typically includes protection against defects in materials and workmanship, as well as coverage for any potential issues that may arise in the future. Homeowners should review the warranty information carefully and keep it in a safe place for future reference. By understanding the warranty coverage, homeowners can have peace of mind knowing that their new roof is protected.
Maintenance Tips for Prolonging Roof Life
Proper maintenance is key to prolonging the life of a new roof. The roofing professional will provide homeowners with maintenance tips to ensure that the roof remains in optimal condition. This includes:
- Regular inspections to identify any potential issues early.
- Cleaning gutters to prevent water damage.
- Trimming overhanging branches to avoid damage from falling debris.
Homeowners should also be aware of any signs of wear and tear, such as missing shingles or leaks, and address them promptly. By following these maintenance tips, homeowners can extend the lifespan of their new roof and ensure that it continues to provide reliable protection.
Handling Future Repairs and Inspections
Even with proper maintenance, future repairs and inspections may be necessary to address any issues that arise over time. Homeowners should schedule regular inspections with a professional roofing contractor to identify and address any potential problems early. This proactive approach can prevent minor issues from becoming major repairs and ensure that the roof remains in good condition. Homeowners should also keep a record of any repairs or inspections conducted, as this information can be valuable for future reference. By staying proactive and addressing any issues promptly, homeowners can ensure the longevity and quality of their new roof.
Wrapping Up: Your Roofing Journey Simplified
Navigating the roofing installation process doesn’t have to be overwhelming. From the initial consultation and FREE DETAILED ROOF INSPECTIONS to the final walkthrough, understanding each step can make the experience smoother and more manageable. Detailed estimates and timeline expectations help you plan effectively, while preparing your home and understanding the role of weather ensures a seamless start. On installation day, the professional crew’s arrival, safety measures, and meticulous removal of old materials set the stage for a high-quality installation.
Post-installation, a final walkthrough with the roofing professional, understanding your warranty, and following maintenance tips ensure the longevity and quality of your new roof. Regular inspections and proactive repairs keep your roof in top condition, providing peace of mind and reliable protection. Remember, a well-installed roof adds significant value to your home and ensures safety. So, as you start this journey, know that we’ve got you covered every step of the way. Isn’t it time you felt confident and informed about your roofing project?